Monday, January 31, 2011

There's a mouse in my house!

Well, there's more than one. I love House Mouse and all his mousey friends. This stamp jumped out at me when I went to my favourite store with my friend M. She told me about this one, and it is befitting that she got the first card made with it.

 The colours came together on this one really quickly. I started with colouring the image- copics were used here. I picked a blue cardstock that matched the ink colour and matted it with a darker blue. The notebook paper in the back was cut from a piece of designer paper I had in a big block pad of Christmas paper. I cut it out and attached it to the backside of the card.
Once the image was stamped, coloured and mounted, it needed a little something, so I added small silver brads and the silver ribbon. The Merry Christmas sentiment is stickers.

A close-up of the stamped image. To get the detail on his hat, I used puffy paint and heated it quickly with my heat gun.

Tuesday, January 25, 2011

Alcohol inks two ways

I love the versatility of alcohol inks. The same colours never result in the same result, and recently, I stumpled upon a new technique that I really like.
It was on the Ink Stains with Roni website. It's called Groovy Inks, and with a little experimentation, I've found what works for me.
This first card was taken by my mom for my aunt's birthday.
The butterfly was from Michaels in the $1.50 bin. I used orange and yellow alcohol inks (can't remember which colours- must remember to write this stuff down!) using Roni's technique. The background was embossed using a Cuttlebug folder and sponged with rust ink. The butterfly was placed on top of the bird that was embossed from the folder.
Rust coloured cardstock was used for the background. 

The next card was for my mom's cousin's wife. He passed away recently, and she asked me to make a sympathy card.
I used blue alcohol inks and silver  to make the pattern on the top layer.  I then stamped and embossed the flower using the Because I Care set. I layerd it onto black cardstock and then on blue that I embossed with the swirl Cuttlebug folder.
For the sentiment, I cut three ovals out- one from the blue, one black and one alcohol ink. The black ribbon brought it all together.

Thursday, January 20, 2011

My little cousin is getting married!

One of my youngest cousins is getting married. I am so excited for her. She's found the right guy, and he fits in amazingly well with our family. He met most of us at Christmas and didn't run the other way, so he's got to be a keeper.
Her fiance seems like a really sweet guy, and I wanted to make a card for them that they can both enjoy. He's visually impaired, and I wanted to make sure he could see the card, too. It has taken me somewhat out of my normal comfort zone, but that's what art is about- pushing the limits and making you explore the possibilities.
This is the second card that I've made this week that needed that little something extra, and it turned out to be a little extra colour.
I had selected my colours, then decided I didn't want to go with blues and greys. I love black and white, it's so classic and timeless. The stamp is from Stampin' Up- can't remember which set, though.

I started with black and white- the white layer is corrugated paper  that I got from the dollar store. The black layer is cut at 4.25 by 5.5. I added the red when I decided that the front layers of the card needed to have red on them as well. 
I had the black, white and metallic gray cut out first and layered. I decided they needed something, and added the red when I discovered the red hearts in my stash. They were a Christmas gift from my husband. Usually I hate hearts (not a fan of Valentine's Day), but they worked on this card. 
Back to the how-to. I layered the card stock and then ran it through the Cuttlebug- Swiss Dots for the large square and Swirls for the small square. 
The ribbon is actually two ribbons glued together. The bling on the smaller ribbon added a little bit of sparkle, and picked up on the silver hearts. The oval with Cherish stamped in the centre was sponged with black around the edges. 
I hope she likes it, and I wish them a lifetime of happiness.

Wednesday, January 19, 2011

My orange period

Recently, I went through my paper and tried to get it organized. Mostly because I couldn't find anything, and I was getting tired of looking for certain colours. I bought magazine holders and sorted my paper by colour family. I was surprised at how much I had in the orange family. I am not usually a fan of orange, and wouldn't buy it on its own, but I have some that has been included in other paper packs.
I do, however, love this rust colour from Stampin' Up. I was in the mood for spring, and have this new stamp, Fresh Cuts, also from Stampin' Up. I cut the rust paper , cut the layers for the image 1/4 inch larger for each layer. I used the rust ink to sponge around the edges of the white and also rubbed some of the rust on the lattice punch. I am really pleased how this turned out. It brought a little bit of spring to my -40 day. I will be finding other ways to use this colour, for sure.


Saturday, January 15, 2011

Quick and easy

Yesterday, a co-worker asked me to make a sympathy card for someone who supported the military. The only thing she said she wanted on it was a yellow ribbon. Yellow ribbons have become synonymous with support for the military, and ideas immediately started to flow. I love it when a card comes together quickly. This one probably would have taken about 10 minutes, if I actually listened to the creative voices.
I usually check splitcoaststampers.com once a day to see what's going on and for a little bit of inspiration.  The Free for All challenge on Friday was to use texture- at least two forms.


I cut a mat of soft yellow, then a 4 by 5.25 piece of metallic white card and embossed it with a Sizzix folder.
The smaller embossed piece is done with the Cuttlebug swirls folder.
The stamp came from the $1.50 bin at Michael's and was coloured in with copics.
I assembled the card and added a little bit of ribbon and thought I was done.
The card needed a little something more to tie it together, but I wasn't sure what. Then it hit me- it needed a little bit more black to tie in with the ribbon, so, I pulled the card apart (amazingly didn't rip a single thing), cut a piece of black a little larger than the white, and put it all back together. I am pretty pleased with the results... quick, easy, clean and simple. I love it when a plan comes together.

Monday, January 10, 2011

Snow

Winter has settled in for the long haul. It's warmer here today- only minus 14. Warmer temps usually mean snow, and there were big, fat fluffy flakes falling today.
I have had this stamp since last summer. I picked it up while travelling through the US on our way home from my husband's family. I looked at it several times while I was making Christmas cards last year, but just couldn't get the inspiration to do anything with it.
This weekend, while I was trying to get into the groove to make my cards for the February Christmas card challenge at splitcoaststampers.com,  this stamp was calling to me.

This stamp is by Northwood Rubber Stamps. There's a double oval around the scene, which I wasn't really fond of, so I cut the scene out. Originally. I put the stamp on a green background, but decided I didn't like it. The red makes the birds pop out more. I coloured the scene in with copics. The birds are done with R24 and 39, and the highlights are done with R59 (Cardinal). The pine boughs are coloured with G24 and G29. The branches are coloured with E57.
 
The scene was attached to a Nestabilities cutout. The kraft paper was embossed with Stampin' Up's Petals 'o Plenty embossing folder. The red cardstock was attached using double stick foam on top of the ribbon, which was glued down on the card. 
This card shows the detail of the snow. I painted on three dimensional glitter paint to highlight the snow on the boughs. It adds just a little bit of sparkle and shine to to card. One down, 11 more to go. 

Thursday, January 6, 2011

On a roll

... two posts in one week... I am on track so far this year!

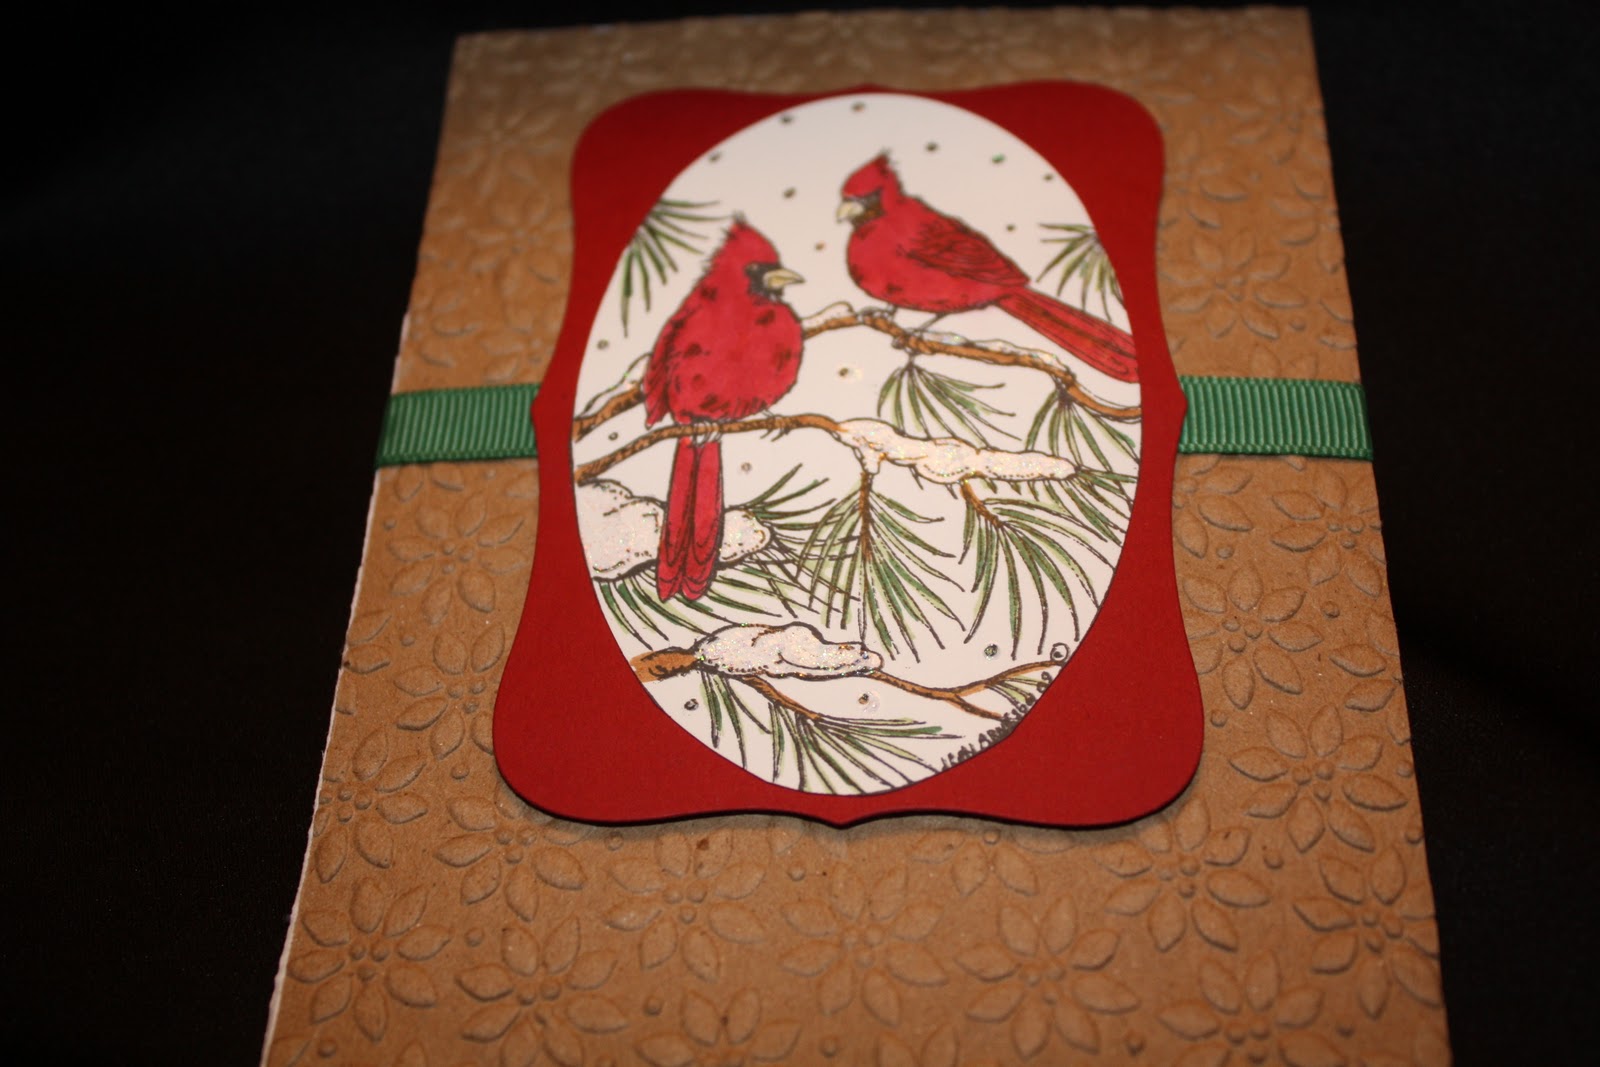
I made this card for my dad's 66th birthday which is in a couple of weeks. It's a chilly -30 with the windchill, so I've been more inclined to play in my (somewhat) tidy craft area. It's nice to hang out in the basement with a critter or two when you don't want to play outside.

 I love this stamp. I've used it several times since I bought it last winter at Scrapyard in Stonewall. Best $4.99 I've spent!
Here's the details...
The background was done with three shades of blue sponged on to white cardstock. I started with the lightest shade in the centre and then layered a darker shade then the darkest blue on the outer edge.
Then, I stamped the deer in dark brown and embossed using a clear embossing powder. The trees were added after, and also embossed in clear.
The snow is Tulip puffy paint. It's way cheaper than the puffy paint you can get from scrapbooking stores, and I find it dries faster and better. The applique paint seems to be tacky, even after it's dried for several hours or days. (my opinion).
For the puffy paint, you apply it and then hit it with the heat gun, and it puffs up. You do need to be a little careful, because if you overheat it, it will darken and possibly burn. Looks like toasted marshmallows when that happens.

I made this one for my dear friend who recently lost her mom. I see myself getting a lot of use out of this set, too.

The flower is from Because I Care by Stampin' Up!. It was stamped on to an alcohol ink background (2.5 by 3.5 glossy card) and layered onto a light and dark purple card stock. The flower is embossed in black to make it stand out a bit more and to add texture.
The light purple layer was embossed with a Cuttlebug folder. Also a new addition to my stamping stash, courtesy of Scrapyard. Love their sales!
The butterfly was a happy accident. When I use the alcohol inks, I usually put a white piece of paper or card underneath. I went over the edge slightly, and really loved how it turned out, so I grabbed my MS butterfly punch and punched it out. It's attached with a small piece of double stick foam.
The sentiment is punched out with the oval and slightly overlapped with a plain purple oval.
I added the ribbon because it needed a little something, and it gives it just that little bit of sheen (also known as bling).

As I've been tiding my craft space, I've been devising plans for more cards. Can't wait to see what the paper turns into over the next couple of weeks.

Tuesday, January 4, 2011

A new year, a new resolution

It's been insanely busy for me for the past month or so. We had company over Christmas, and the hectic pace of the holidays took over.

So, new year, new resolution. I am planning to make cards at least twice per week. My parents have a greenhouse, and last year, I had cards available there for sale. I sold a few... it was a good start, anyway. I have also entered the Christmas card challenge at Splitcoast stampers, so I'll be making cards all year long, which will hopefully lessen the intensity at the end of the year.

Today is my last day of vacation before I head back to the real world tomorrow. I am looking forward to getting back into the swing of things for work. We have a gala coming up in about seven weeks, so it'll be full out getting ready for that. I decided to play today in my newly-organized craft area. Husband bought me a few things for Christmas to help me get my space organized, and now my paper has it's own home, my stamps are mostly organized, and I can see space on the top of my work area. It's so nice to be able to play when I have more than six inches to work.

This is the first holiday card for 2011...


 I made 15 of these cards. I really love this stamp. It reminds me of stickers I bought last year, and I haven't been able to find since.

Here's a close up. The cardstock used was baroque blue from Stampin' Up! and the white cardstock is from Staples. The base is 4.25 by 5.5, the white was cut for 4 by 5.25 and then put through my Cuttlebug. The top white cardstock is 3 by 3, stamped with black Momento ink and coloured using copics. I shot it with glimmer mist to give it a little sparkle and shine. The snowflake dot was from the dollar store, and attached with a piece of double sided foam. The stamp is from Great Impressions.


A close-up of the card.

That's it for now... next up will be a card I made for my dad's birthday.